在 macOS 和 Windows 上解锁 WebAssembly
在 macOS 和 Windows 上无缝运行 WebAssembly/Wasm 二进制文件
你最近可能听说了关于 Wasm 和 WASI 的热议。想象一下,你可以毫不费力地运行 Wasm 二进制文件,并使用开放容器倡议(OCI)容器镜像来分发它们——一个单一的镜像就能部署在多种架构上。
尽管这个概念看起来很直接,但完成这项任务却相当具有挑战性,尤其是在 macOS 和 Windows 上。复杂性来自于需要运行一个额外的 Linux 虚拟机。这台虚拟机需要正确设置所有的依赖项和先决条件。
等待已经结束。我们的博文揭示了解决方案,指导您在 macOS 和 Windows 上启用 Wasm 工作负载的过程。

什么是 WebAssembly?
WebAssembly(简称 Wasm)被设计为一种面向编程语言的可移植编译目标,旨在提升 Web 应用程序(包括游戏/模拟器)的性能和可移植性。使用低级二进制格式而非 JavaScript,可以让应用程序获得近乎原生的性能。
这种二进制格式作为一个编译目标,允许使用更广泛的编程语言,如 C、C++ 和 Rust。虽然它最初是一项浏览器/客户端技术,但现在正逐渐超越 Web 领域,例如被应用于后端或边缘技术(这与 Java 的发展历程类似,Java 最初也是为客户端设计的,后来才应用于服务器端)。
Wasm 二进制格式被设计为安全的。Wasm 模块与系统的其余部分隔离,未经明确许可,它们无法访问任何系统资源。这使得 Wasm 模块即使在不受信任的环境中运行也非常安全。但另一方面,对于开发后端应用程序来说,这一限制也制约了 Wasm 的使用。
WebAssembly 的扩展
WebAssembly 系统接口(WASI)应运而生,成为 WebAssembly 的重要补充。
它是一个系统接口,将 WebAssembly 的能力扩展到浏览器之外,使其适用于更广泛的环境,包括服务器、边缘设备等。
在 Wasm 中,你对主机资源的访问权限有限,而 WASI 提供了一套标准的系统调用,使 WebAssembly 模块能够以安全、一致的方式与主机操作系统交互:这包括文件系统访问、套接字和其他底层资源。
在浏览器外运行 WebAssembly
Wasm 已经被主流浏览器引擎内置,因此在浏览器领域使用 Wasm 无需任何第三方插件。但当涉及到边缘/系统使用时,你需要找到一个支持 WASI 扩展的虚拟机来运行这些工作负载。而且,运行它们的应用程序不止一个,有多种 Wasm 运行时,如 WasmEdge、Wasmtime、Wasmer 等。所有运行时都支持不同的 CPU 架构。
由于 WASI 仍在发展中,这些运行时中提供的某些 API 尚未成为标准,因此用户需要谨慎编写可移植的应用程序,避免依赖于特定的运行时。
除了在你的计算机上运行 Wasm/WASI 工作负载,还有一个问题是如何打包、共享和分发这种二进制格式。一种便捷的分发和运行这些工作负载的方式是使用 OCI 镜像,因为它提供了所有基础功能:打包、存储和分发二进制文件。接下来是执行部分。
将 Podman 引擎与 Wasm 结合使用
在 macOS 或 Windows 上使用 Podman 运行容器时,会有一个名为“Podman machine”的虚拟机来执行 Linux 环境。我们需要在这个 Linux 环境中添加对 Wasm 的支持。Podman 使用 crun 项目作为其 OCI 运行时,所以 crun 需要能够运行或委托执行给 Wasm 运行时。幸运的是,crun 支持 Wasm 执行。
从用户的角度来看,对 Wasm 的支持是作为一个额外的平台提供的。因此,在执行 Wasm 工作负载时,我们指定平台为 --platform=wasi/wasm,而不是像 --platform=linux/arm64 或 --platform=linux/amd64 这样。
使用 Podman 运行 Wasm 工作负载
设置
- Windows
- macOS
在 Windows 上,请确保你的 Podman machine 是最新版本。你可以使用 podman version 命令进行检查。
根据命令的输出,你可能需要执行额外的步骤。
- 客户端版本和服务器端版本 >= v4.7.0:无需任何操作,默认已通过 wasmedge 运行时支持 Wasm。
- 客户端版本 >= 4.6.0 但服务器端版本 < 4.7:你需要使用 `podman machine init --now wasm` 命令创建一个新的 Podman machine。
- 旧客户端/旧服务器(< 4.7.0)或未安装 Podman:请遵循 podman.io 的入门指南。
在 macOS 上,请确保你的 Podman machine 是最新版本。你可以使用 podman version 命令进行检查。它需要 v4.8+ 版本。
根据命令的输出,你可能需要执行额外的步骤。
- 客户端版本和服务器端版本 >= v4.8.0:无需任何操作,默认已通过 wasmedge 运行时支持 Wasm。
- 客户端版本 >= 4.8.0 但服务器端版本 < 4.8:你需要使用 `podman machine init --now wasm` 命令创建一个新的 Podman machine。
- 旧客户端/旧服务器(< 4.8.0)或未安装 Podman:请遵循 podman.io 的入门指南。
运行 Wasm 镜像
让我们尝试一个简单的 hello world 示例。
我们将使用来自 https://github.com/redhat-developer/podman-desktop-demo/tree/main/wasm/rust-hello-world 的示例。
在 quay.io 上已经有一个 OCI 镜像。
要运行该工作负载,我们将使用以下命令
$ podman run --platform wasi/wasm quay.io/podman-desktop-demo/wasm-rust-hello-world
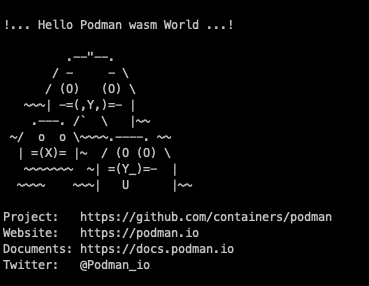
运行该命令后,你会看到一个“Podman Hello World”输出,这是由一个 Rust 项目使用 println 函数并使用编译时的 --target wasm32-wasi 参数编译成 Wasm 的结果。

你可以省略 --platform wasi/wasm 标志,但在这种情况下,你会收到一个警告,提示镜像的平台与你的计算机平台不匹配(WARNING: image platform (wasi/wasm) does not match the expected platform (linux/arm64))。
从这里开始,你可以运行其他使用 Wasm 工作负载的 OCI 镜像,而不仅仅是 podman hello world 示例。
注意: 如果你的 Podman machine 中没有安装必要的先决条件,你会看到这个错误:Error: requested OCI runtime crun-wasm is not available: invalid argument
在这种情况下,你应该检查上一节提到的先决条件是否已满足。
使用 Podman 构建 Wasm OCI 镜像
使用特定平台/架构进行构建
从消费者的角度来看,运行 Wasm 工作负载是一个有趣的用例。它有助于消费 Wasm 二进制文件。但另一个有趣的用例是分发和构建这些 Wasm 镜像,以便任何人都可以快速运行它们。
目标是创建一个仅包含 Wasm 二进制文件的最小化镜像。为此,我们将使用多阶段构建。第一阶段是构建/编译 .wasm 二进制文件的平台,第二/最后阶段将该二进制文件复制到一个 scratch 镜像中。
构建镜像时,默认会使用主机的操作系统架构。如果你使用的是带有 ARM 芯片的 Mac 电脑,那么 Linux 镜像将默认为 linux/arm64。使用 Mac/Intel 则会默认为 linux/amd64 镜像。对于 Wasm 工作负载,期望的目标平台是 wasi/wasm。
使用 podman,我们可以在 podman build 命令中使用 --platform=wasi/wasm 标志来指定系统/架构。但如果我们这样做,就意味着如果 Dockerfile 或 Containerfile 包含像 FROM docker.io/redhat/ubi9-minimal 这样的基础镜像,它会尝试使用 wasi/wasm 平台去拉取 ubi9-minimal 镜像,而这个平台当然是不存在的。
因此,我们需要调整 Containerfile,在其中加入一个 --platform 指令。
Containerfile 示例
FROM docker.io/redhat/ubi9-minimal as builder
通过这种方法,我们将拉取与我们主机架构匹配的镜像,但由于命令行上仍然有 --platform=wasi/wasm,最终生成的镜像将使用正确的平台。
源代码
这是一个简单的 Containerfile,用于构建一个 Rust 应用程序,它使用 wasm32-wasi 二进制输出和一个多层 OCI 镜像。一层用于构建(安装 rust、依赖项并编译应用程序),另一层是 scratch 层,我们只添加 .wasm 输出并将其标记为入口点。
源代码可在 https://github.com/redhat-developer/podman-desktop-demo/tree/main/wasm/rust-hello-world 找到。
Containerfile 内容
# Build using the host platform (and not target platform wasi/wasm)
FROM docker.io/redhat/ubi9-minimal as builder
# install rust and Wasm/WASI target
RUN curl --proto '=https' --tlsv1.2 -sSf https://sh.rustup.rs | sh -s -- -y \
&& source "$HOME/.cargo/env" && rustup target add wasm32-wasi
# copy source code
COPY Cargo.toml /app/
COPY src /app/src
# change working directory
WORKDIR /app
# Build
RUN source "$HOME/.cargo/env" && cd /app && cargo build --target wasm32-wasi --release
# now copy the Wasm binary and flag it as the entrypoint
FROM scratch
ENTRYPOINT [ "/rust-hello-world.wasm" ]
COPY /app/target/wasm32-wasi/release/rust-hello.wasm /rust-hello-world.wasm
Cargo.toml 内容
[package]
name = "rust-hello-world"
version = "0.1.0"
edition = "2021"

[[bin]]
name = "rust-hello"
path = "src/main.rs"
以及 Rust 程序 src/main.rs
  fn main() {

    // use of strings literal for multi-line string
    // https://doc.rust-lang.net.cn/reference/tokens.html#raw-string-literals

    // ascii art from Máirín Duffy @mairin
    let hello = r#"
!... Hello Podman Wasm World ...!

         .--"--.
       / -     - \
      / (O)   (O) \
   ~~~| -=(,Y,)=- |
    .---. /`  \   |~~
 ~/  o  o \~~~~.----. ~~
  | =(X)= |~  / (O (O) \
   ~~~~~~~  ~| =(Y_)=-  |
  ~~~~    ~~~|   U      |~~

Project:   https://github.com/containers/podman
Website:   https://podman.org.cn
Documents: https://docs.podman.org.cn
Twitter:   @Podman_io
"#;
    println!("{}", hello);

  }
所有源代码都可以在 https://github.com/redhat-developer/podman-desktop-demo/tree/main/wasm/rust-hello-world 找到。
构建 Wasm 镜像
如果你克隆了仓库,请从 wasm/rust-hello-world 文件夹运行该命令,或者从包含所有文件的目录运行。
$ podman build --platform=wasi/wasm -t rust-hello-world-wasm .
输出示例将是
[1/2] STEP 1/6: FROM docker.io/redhat/ubi9-minimal AS builder
Trying to pull docker.io/redhat/ubi9-minimal:latest...
Getting image source signatures
Copying blob sha256:472e9d218c02b84dcd7425232d8b1ac2928602de2de0efc01a7360d1d42bf2f6
Copying config sha256:317fc66dad246d1fac6996189a26f85554dc9fc92ca23bf1e7bf10e16ead7c8c
Writing manifest to image destination
[1/2] STEP 2/6: RUN curl --proto '=https' --tlsv1.2 -sSf https://sh.rustup.rs | sh -s -- -y     && source "$HOME/.cargo/env" && rustup target add wasm32-wasi
info: downloading installer
info: profile set to 'default'
info: default host triple is aarch64-unknown-linux-gnu
info: syncing channel updates for 'stable-aarch64-unknown-linux-gnu'
info: latest update on 2023-10-05, rust version 1.73.0 (cc66ad468 2023-10-03)
info: downloading component 'cargo'
info: downloading component 'clippy'
info: downloading component 'rust-docs'
info: downloading component 'rust-std'
info: downloading component 'rustc'
info: downloading component 'rustfmt'
info: installing component 'cargo'
info: installing component 'clippy'
info: installing component 'rust-docs'
info: installing component 'rust-std'
info: installing component 'rustc'
info: installing component 'rustfmt'
info: default toolchain set to 'stable-aarch64-unknown-linux-gnu'

  stable-aarch64-unknown-linux-gnu installed - rustc 1.73.0 (cc66ad468 2023-10-03)


Rust is installed now. Great!

To get started you may need to restart your current shell.
This would reload your PATH environment variable to include
Cargo's bin directory ($HOME/.cargo/bin).

To configure your current shell, run:
source "$HOME/.cargo/env"
info: downloading component 'rust-std' for 'wasm32-wasi'
info: installing component 'rust-std' for 'wasm32-wasi'
--> c93a3433d432
[1/2] STEP 3/6: COPY Cargo.toml /app/
--> cf4488993835
[1/2] STEP 4/6: COPY src /app/src
--> 531b9389857c
[1/2] STEP 5/6: WORKDIR /app
--> 23379392f585
[1/2] STEP 6/6: RUN source "$HOME/.cargo/env" && cd /app && cargo build --target wasm32-wasi --release
   Compiling rust-hello-world v0.1.0 (/app)
    Finished release [optimized] target(s) in 0.15s
--> e3582e06f45b
[2/2] STEP 1/3: FROM scratch
[2/2] STEP 2/3: ENTRYPOINT [ "/rust-hello-world.wasm" ]
--> 069b1742d906
[2/2] STEP 3/3: COPY --from=builder /app/target/wasm32-wasi/release/rust-hello.wasm /rust-hello-world.wasm
[2/2] COMMIT rust-hello-world-wasm
--> e0948298c0be
Successfully tagged localhost/rust-hello-world-wasm:latest
e0948298c0be20e11da5d92646a2d6453f05e66671f72f0f792c1e1ff8de75ba
这是一个多阶段构建,但最终我们只得到一个包含 Wasm 二进制文件的小镜像。
使用以下命令快速启动它
$ podman run rust-hello-world-wasm
然后我们将看到预期的输出
WARNING: image platform (wasi/wasm/v8) does not match the expected platform (linux/arm64)

!... Hello Podman Wasm World ...!

         .--"--.
       / -     - \
      / (O)   (O) \
   ~~~| -=(,Y,)=- |
    .---. /`  \   |~~
 ~/  o  o \~~~~.----. ~~
  | =(X)= |~  / (O (O) \
   ~~~~~~~  ~| =(Y_)=-  |
  ~~~~    ~~~|   U      |~~

Project:   https://github.com/containers/podman
Website:   https://podman.org.cn
Documents: https://docs.podman.org.cn
Twitter:   @Podman_io
结论
在见证了通过使用 podman 在 Windows 和 macOS 上无缝执行和创建 WebAssembly (Wasm) 工作负载之后,各种可能性尽在你的指尖。
现在,主动权在你手中,开始你的探索、实验和突破边界之旅吧。
运行并构建新的示例,不要犹豫,通过报告和讨论这些问题为 podman 社区做出贡献。
