创建一个 Podman Desktop 扩展
本教程涵盖了创建和运行 Podman Desktop 扩展所需的以下端到端任务:
您可以使用 TypeScript 或 JavaScript 编写扩展。通过在扩展中指定两个入口点:activate() 和 deactivate(),可以简化扩展的创建过程。
所有 Podman Desktop 的功能完全通过 API 进行通信。您创建的扩展通过 @podman-desktop/api 包与 Podman Desktop API 交互。@podman-desktop/api API 的类型定义托管在 npm 包中。
准备工作
请确保您已具备:
- 已安装 Podman Desktop.
- 一个正在运行的 Podman machine.
- 开发者角色。
- 已安装
JavaScript或TypeScript。 - 在您的本地计算机上克隆了 Podman Desktop 仓库。
初始化扩展
创建一个 package.json 文件来初始化您的扩展。
-
在 Podman Desktop 仓库的
extensions目录中创建一个子目录,例如foobar。 -
初始化一个
package.json文件并将其添加到该子目录中。{} -
将
TypeScript和 Podman Desktop API 添加到开发依赖项中"devDependencies": {
"@podman-desktop/api": "latest",
"typescript": "latest",
"vite": "latest"
}, -
添加所需的元数据
"name": "my-extension",
"displayName": "My Hello World extension",
"description": "How to write my first extension",
"version": "0.0.1",
"icon": "icon.png",
"publisher": "benoitf", -
添加运行扩展所需的 Podman Desktop 版本
"engines": {
"podman-desktop": "latest"
}, -
添加主入口点
"main": "./dist/extension.js" -
添加一个
Hello World命令贡献"contributes": {
"commands": [
{
"command": "my.first.command",
"title": "My First Extension: Hello World"
}
]
} -
手动验证完整的
package.json文件示例:完整的
package.json文件{
 "devDependencies": {
   "@podman-desktop/api": "latest",
   "typescript": "latest",
   "vite": "latest"
 },
  "name": "my-extension",
  "displayName": "My Hello World extension",
  "description": "How to write my first extension",
  "version": "0.0.1",
  "icon": "icon.png",
  "publisher": "benoitf",
  "engines": {
    "podman-desktop": "latest"
  },
"scripts": {
"build": "vite build",
"test": "vitest run --coverage",
"test:watch": "vitest watch --coverage",
"watch": "vite build --watch"
},
"main": "./dist/extension.js",
  "contributes": {
    "commands": [
     {
       "command": "my.first.command",
       "title": "My First Extension: Hello World"
     }
   ]
  }
} -
在子目录中添加一个
icon.png文件。
编写扩展入口点
-
在子目录中创建一个
src/extension.ts文件。 -
将 Podman Desktop API 导入到文件中
import * as podmanDesktopAPI from '@podman-desktop/api'; -
使用以下方式之一来暴露
activate函数-
同步(顺序执行任务)
export function activate(): void; -
异步(并行执行任务)
export async function activate(): Promise<void>;
-
-
可选:通过允许扩展注册可释放资源,将扩展上下文添加到
activate函数中export async function activate(extensionContext: podmanDesktopAPI.ExtensionContext): Promise<void> {} -
将扩展的功能添加到文件中。此示例扩展:
- 注册在
package.json文件中引用的命令。 - 为用户显示一个选项,以便从下拉列表中选择值。
- 显示一个弹出消息,其中包含用户选择的值。
- 在状态栏中创建一个项目以运行该命令。
import * as podmanDesktopAPI from '@podman-desktop/api';
export async function activate(extensionContext: podmanDesktopAPI.ExtensionContext): Promise<void> {
  // register the command referenced in package.json file
  const myFirstCommand = podmanDesktopAPI.commands.registerCommand('my.first.command', async () => {
    // display a choice to the user for selecting some values
    const result = await podmanDesktopAPI.window.showQuickPick(['un', 'deux', 'trois'], {
      canPickMany: true, // user can select more than one choice
    });

    // display an information message with the user choice
    await podmanDesktopAPI.window.showInformationMessage(`The choice was: ${result}`);
  });

  // create an item in the status bar to run our command
  // it will stick on the left of the status bar
  const item = podmanDesktopAPI.window.createStatusBarItem(podmanDesktopAPI.StatusBarAlignLeft, 100);
  item.text = 'My first command';
  item.command = 'my.first.command';
  item.show();

  // register disposable resources to it's removed when you deactivte the extension
  extensionContext.subscriptions.push(myFirstCommand);
  extensionContext.subscriptions.push(item);
} - 注册在
-
可选:使用以下方式之一来暴露
deactivate函数-
同步
export function deactivate(): void; -
异步
export async function deactivate(): Promise<void>;注意以上示例并未完全展示扩展可以使用的所有功能。您可以扩展 Podman Desktop 的内部功能,例如创建新的提供者和添加新命令。请参阅我们的 API 文档以获取更多信息。
-
构建依赖项
您可以通过配置 TypeScript 和 Vite 来构建此扩展。
- 在子目录中创建一个名为
tsconfig.json的文件,并包含以下内容:
{
  "compilerOptions": {
    "module": "esnext",
    "lib": ["ES2017"],
    "sourceMap": true,
    "rootDir": "src",
    "outDir": "dist",
    "target": "esnext",
    "moduleResolution": "Node",
    "allowSyntheticDefaultImports": true,
    "resolveJsonModule": true,
    "skipLibCheck": true,
    "types": ["node"]
  },
  "include": ["src", "types/*.d.ts"]
}
- 在子目录中创建一个名为
vite.config.js的文件,并包含以下内容:
/**********************************************************************
 * Copyright (C) 2023 Red Hat, Inc.
 *
 * Licensed under the Apache License, Version 2.0 (the "License");
 * you may not use this file except in compliance with the License.
 * You may obtain a copy of the License at
 *
 * https://apache.ac.cn/licenses/LICENSE-2.0
 *
 * Unless required by applicable law or agreed to in writing, software
 * distributed under the License is distributed on an "AS IS" BASIS,
 * WITHOUT WARRANTIES OR CONDITIONS OF ANY KIND, either express or implied.
 * See the License for the specific language governing permissions and
 * limitations under the License.
 *
 * SPDX-License-Identifier: Apache-2.0
 ***********************************************************************/

import { join } from 'path';
import { builtinModules } from 'module';

const PACKAGE_ROOT = __dirname;

/**
 * @type {import('vite').UserConfig}
 * @see https://vite.org.cn/config/
 */
const config = {
  mode: process.env.MODE,
  root: PACKAGE_ROOT,
  envDir: process.cwd(),
  resolve: {
    alias: {
      '/@/': join(PACKAGE_ROOT, 'src') + '/',
    },
  },
  build: {
    sourcemap: 'inline',
    target: 'esnext',
    outDir: 'dist',
    assetsDir: '.',
    minify: process.env.MODE === 'production' ? 'esbuild' : false,
    lib: {
      entry: 'src/extension.ts',
      formats: ['cjs'],
    },
    rollupOptions: {
      external: ['@podman-desktop/api', ...builtinModules.flatMap(p => [p, `node:${p}`])],
      output: {
        entryFileNames: '[name].js',
      },
    },
    emptyOutDir: true,
    reportCompressedSize: false,
  },
};

export default config;
运行扩展
-
如果 Podman Desktop 应用程序正在后台运行,请停止它。
-
从您克隆的 Podman Desktop 仓库中运行以下命令:
pnpm watch --extension-folder <path-to-your-extension>该扩展会编译并在子目录的
dist文件夹中生成输出。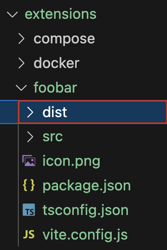 注意
注意您也可以直接从 Podman Desktop UI 运行和验证扩展。
验证扩展功能
-
点击左侧导航窗格中的扩展。
-
在列表中搜索已创建的
My Hello World扩展。该扩展状态为ACTIVE(活动)。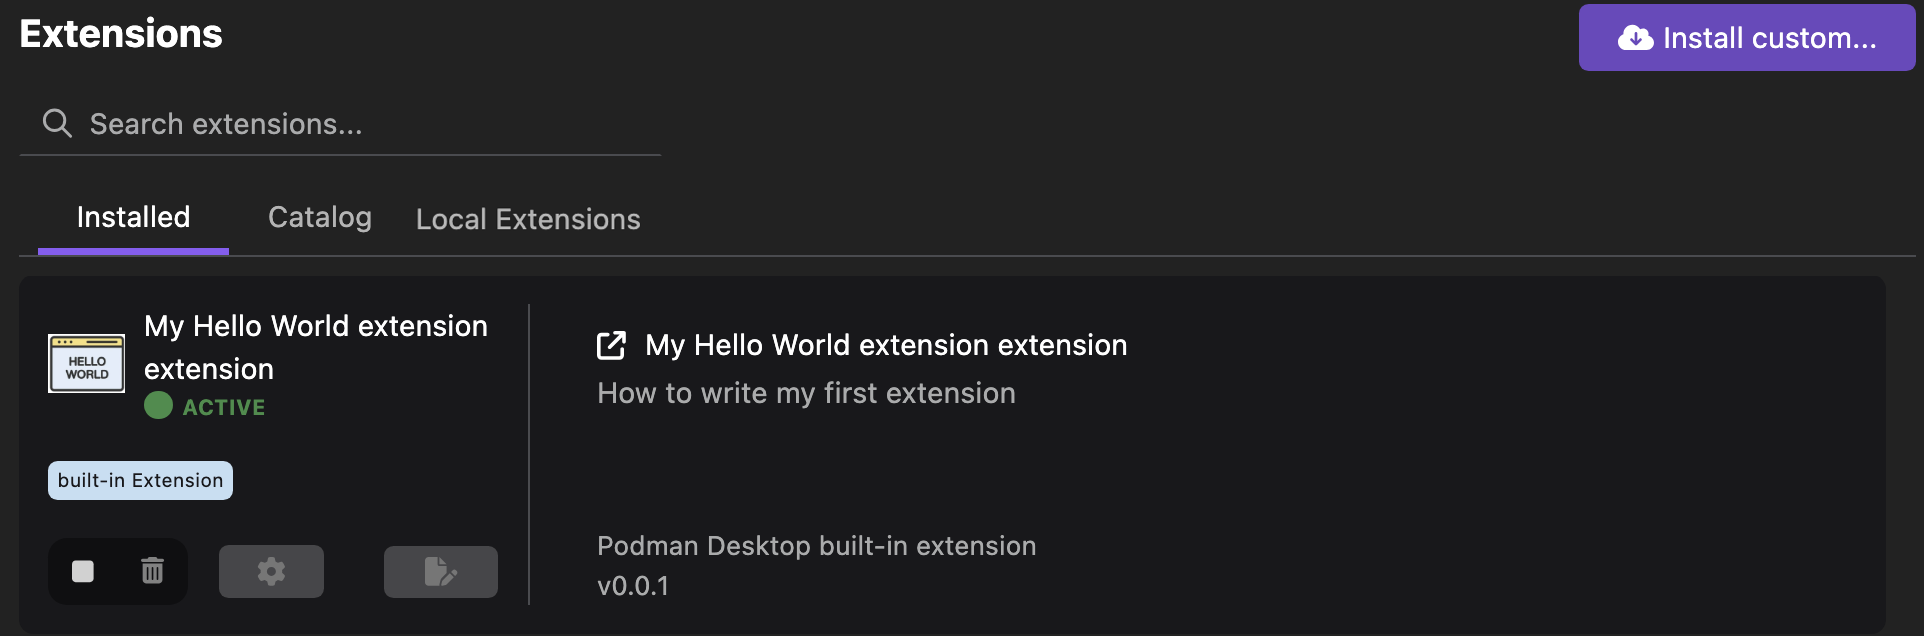
-
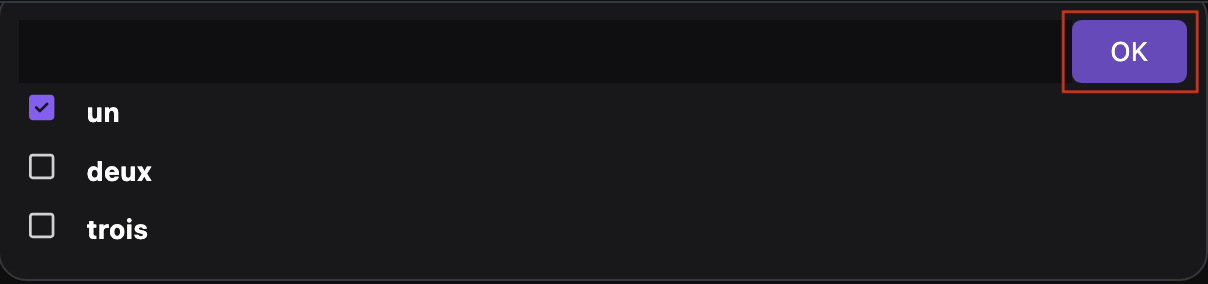
验证扩展的功能:
-
点击状态栏中的
My first command项目。一个下拉列表将打开。 -
从下拉列表中选择一个值。
-
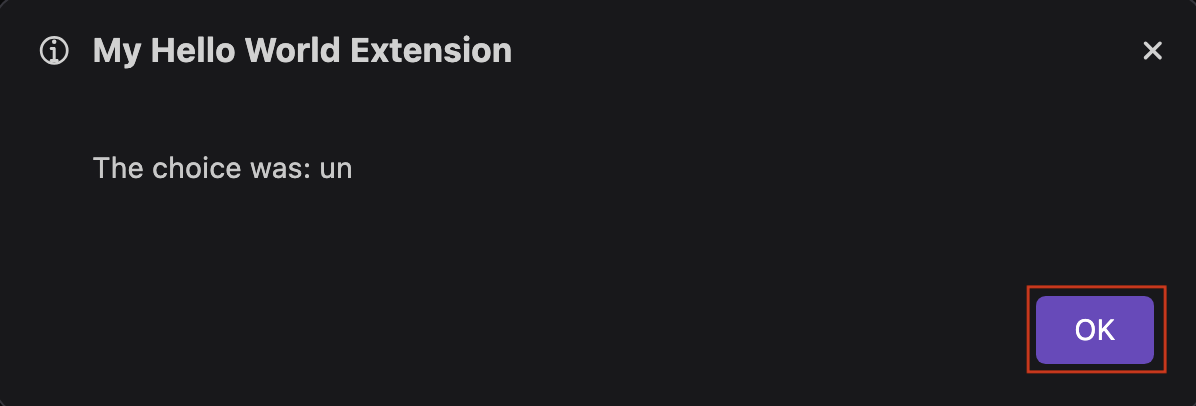
点击确定。一个通知所选值的弹出窗口会打开。
-
点击确定。
 注意
注意如果您创建了一个 webview 扩展,您可以访问该扩展的控制台:
- 在左侧导航窗格中右键单击扩展图标。
- 选择打开 webview 的开发者工具。