新手引导
Podman Desktop 扩展可以提供新手引导工作流,以指导用户安装和设置扩展所需的所有工具,并可选地提供有关扩展功能的解释。
向扩展添加新手引导非常简单,只需在 package.json 中编写 JSON 即可。Podman Desktop 会将 JSON 对象转换为实际代码以渲染所有项目。
新手引导包括标题、描述、媒体(图像)、启用条款和步骤列表。只有标题、启用条款和步骤是强制性的,因为它们构成了定义工作流所需的最少信息。在深入细节之前,让我们检查一下 JSON 模式。
{
  "title": "onboarding",
  "type": "object",
  "properties": {
    "title": {
      "type": "string"
    },
    "description": {
      "type": "string"
    },
    "media": {
      "path": {
        "type": "string"
      },
      "altText": {
        "type": "string"
      }
    },
    "enablement": {
      "type": "string"
    },
    "steps": {
      "type": "array",
      "items": {
        "type": "object",
        "properties": {
          "id": {
            "type": "string"
          },
          "title": {
            "type": "string"
          },
          "description": {
            "type": "string"
          },
          "media": {
            "path": {
              "type": "string"
            },
            "altText": {
              "type": "string"
            }
          },
          "command": {
            "type": "string"
          },
          "completionEvents": {
            "type": "array",
            "items": {
              "type": "string"
            }
          },
          "content": {
            "type": "array",
            "items": {
              "type": "array",
              "items": {
                "type": "object",
                "properties": {
                  "value": {
                    "type": "string"
                  },
                  "highlight": {
                    "type": "boolean"
                  },
                  "when": {
                    "type": "string"
                  }
                },
                "required": ["value"]
              }
            }
          },
          "when": {
            "type": "string"
          },
          "component": {
            "type": "string",
            "enum": ["createContainerProviderConnection", "createKubernetesProviderConnection"]
          },
          "state": {
            "type": "string",
            "enum": ["completed", "failed"]
          }
        },
        "required": ["id", "title"]
      }
    }
  },
  "required": ["title", "enablement", "steps"]
}
标题、描述和媒体
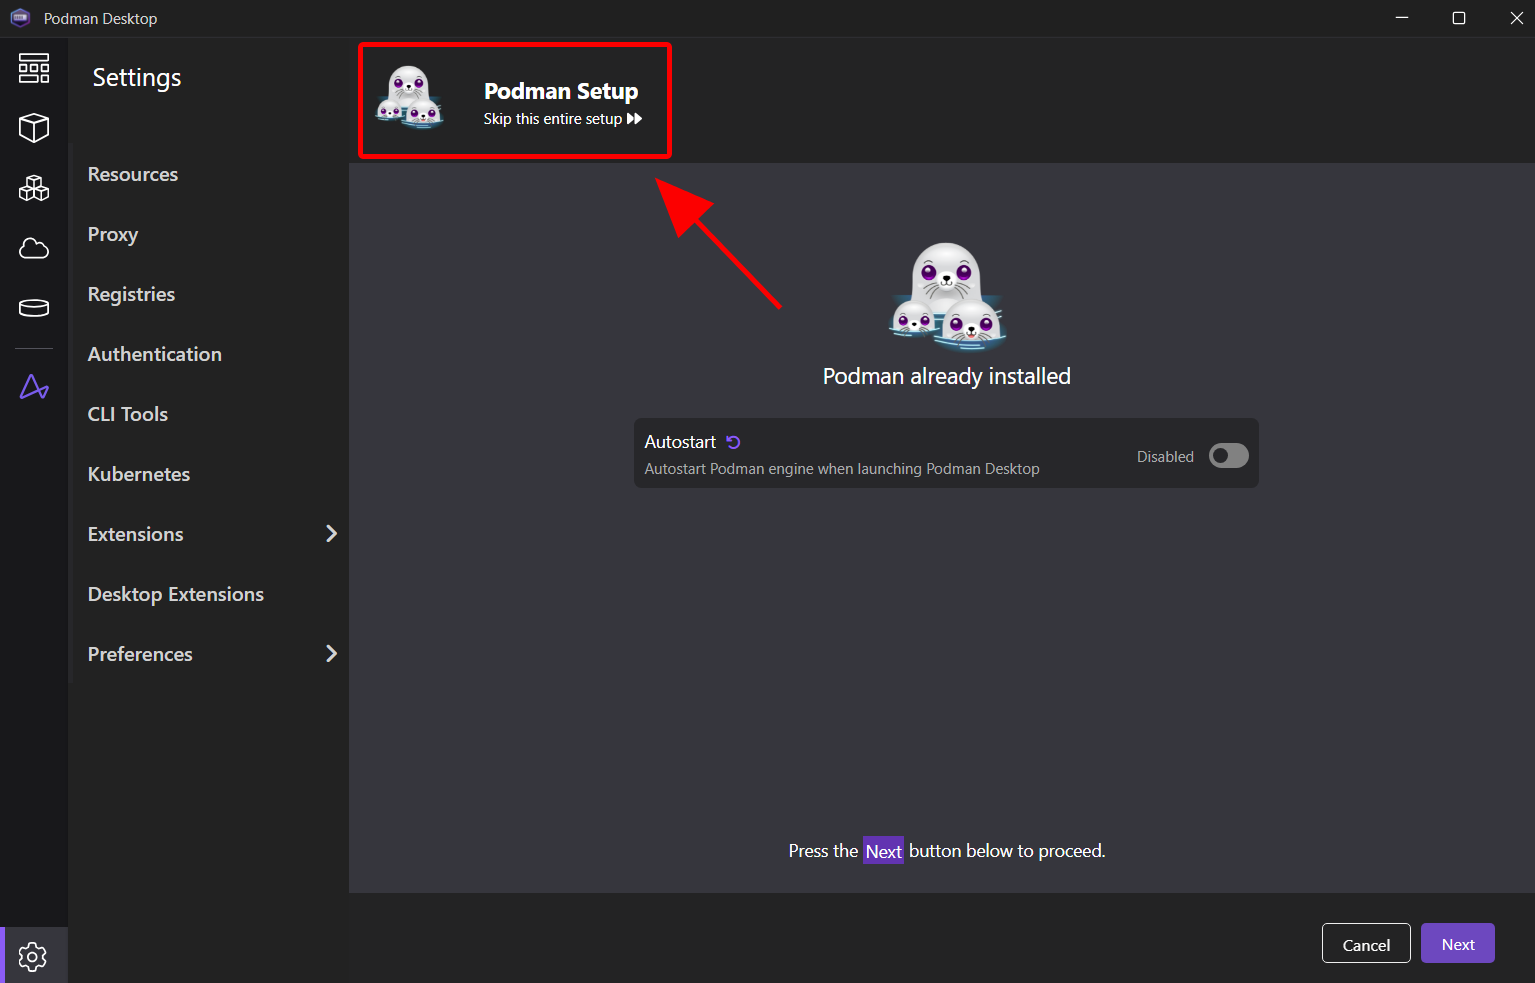
标题、描述和媒体都放置在新手引导页面的左上方。只有标题是必需的。描述和媒体是可选的。如果未指定媒体,Podman Desktop 将显示扩展在其 package.json 中设置的默认图标。
此 JSON 的定义方式如下
"icon": "icon.png",
...
"onboarding": {
    "title": "Podman Setup",
}
启用
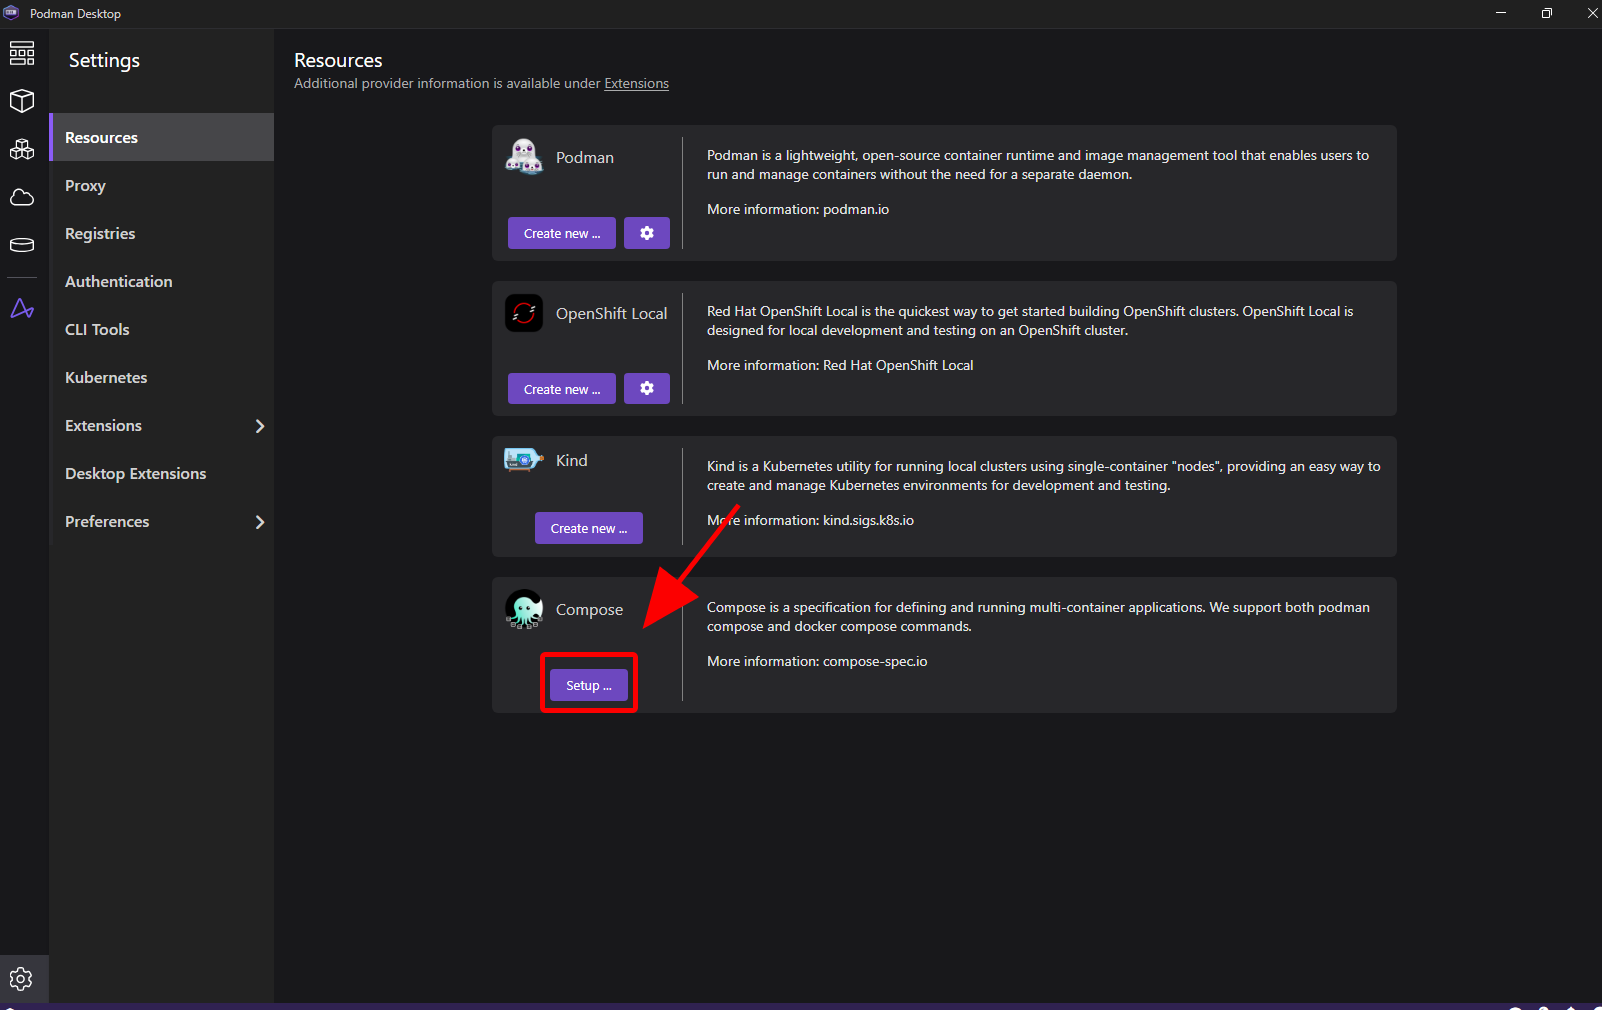
启用条款允许 Podman Desktop 确定何时应启用新手引导。满足此条件后,用户将在资源页面中找到一个设置按钮。单击它将启动新手引导工作流。
启用条款是强制性的,必须使用when 子句编写。
在以下示例中,我们指定只有当用户的操作系统是 Linux 且 podmanIsNotInstalled 上下文值为 true 时才需要启用新手引导。或者,如果用户的操作系统与 Linux 不同,则 podmanMachineExists 上下文值必须为 false。本质上,如果用户在 Linux 上,只有在 Podman 未安装时才必须启用新手引导;对于所有其他操作系统,如果不存在 Podman 机器,则应启用新手引导。
"enablement": "(isLinux && onboardingContext:podmanIsNotInstalled) || (!isLinux && !onboardingContext:podmanMachineExists)"
步骤
steps 属性是必需的,包含在工作流期间将显示给用户的实际内容。
每个步骤都可以通过各种方式为新手引导过程做出贡献。您可以选择显示解释概念的内容,包含输入元素(例如按钮或文本框)以鼓励用户交互,运行命令执行安装,或展示要配置的设置。
我们再来看看它的模式
"type": "object",
"properties": {
    "id": {
        "type": "string"
    },
    "title": {
        "type": "string"
    },
    "description": {
        "type": "string"
    },
    "media": {
        "path": {
            "type": "string"
        },
        "altText": {
            "type": "string"
        },
    },
    "command": {
        "type": "string"
    },
    "completionEvents": {
        "type": "array",
        "items": {
            "type": "string"
        }
    },
    "content": {
        "type": "array",
        "items": {
            "type": "array",
            "items": {
                "type": "object",
                "properties": {
                    "value": {
                        "type": "string"
                    },
                    "highlight": {
                        "type": "boolean"
                    },
                    "when": {
                        "type": "string"
                    }
                },
                "required": ["value"]
            }
        }
    },
    "when": {
        "type": "string"
    },
    "component": {
        "type": "string",
        "enum": ["createContainerProviderConnection", "createKubernetesProviderConnection"]
    },
    "state": {
        "type": "string",
        "enum": ["completed", "failed"]
    }
},
"required": ["id", "title"]
一个步骤只有两个强制字段——id 和 title。所有其他属性都是可选的。
Id
id 必须是唯一的以标识一个步骤,并且它永远不会直接显示给用户。
为了更轻松地在遥测中分析用户执行的步骤,id 值必须遵守一些规则。为了帮助开发人员遵守这些规则,当 Podman Destop 加载新手引导时,如果出现不遵守的情况,将显示警告。
规则如下:
- 对于定义命令的步骤,id 必须以
Command结尾, - 对于定义
state='failed'的状态,id 必须以Failure结尾, - 对于定义
state='completed'的状态,id 必须以Success结尾, - 对于任何其他步骤,id 必须以
View结尾。
标题、描述和媒体
标题、描述和媒体的工作方式与前面解释的一样。唯一的区别是它们的位置——它们将出现在正文的顶部中心。
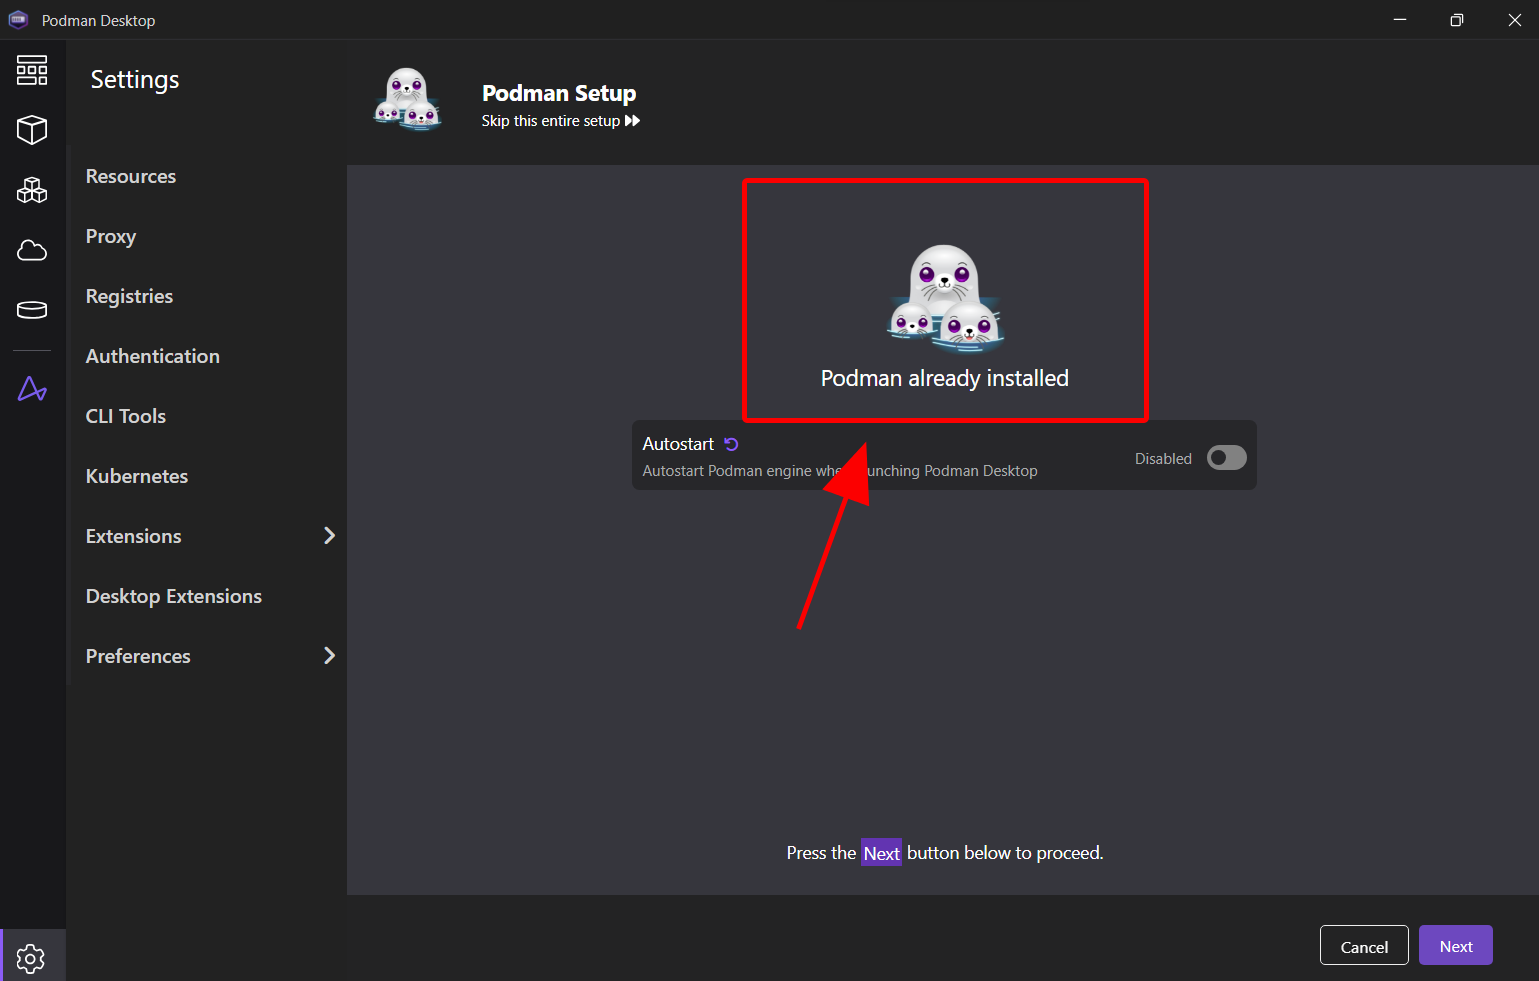
注意:如果未指定媒体,Podman Desktop 将显示提供新手引导的扩展的图标。
命令
command 字段允许您声明当步骤变为活动状态时必须运行的命令的名称。该命令必须事先由扩展注册,否则将导致错误。
在下面的示例中,我们告诉 Podman Desktop 在 checkPodmanInstalled 步骤变为活动状态时调用 podman.onboarding.checkPodmanInstalled。根据结果,我们可以提示用户移动到另一个步骤或显示消息。
"commands": [
{
"command": "podman.onboarding.checkPodmanInstalled",
"title": "Podman: Check podman installation"
},
],
"onboarding": {
"title": "Podman Setup",
"steps": [
{
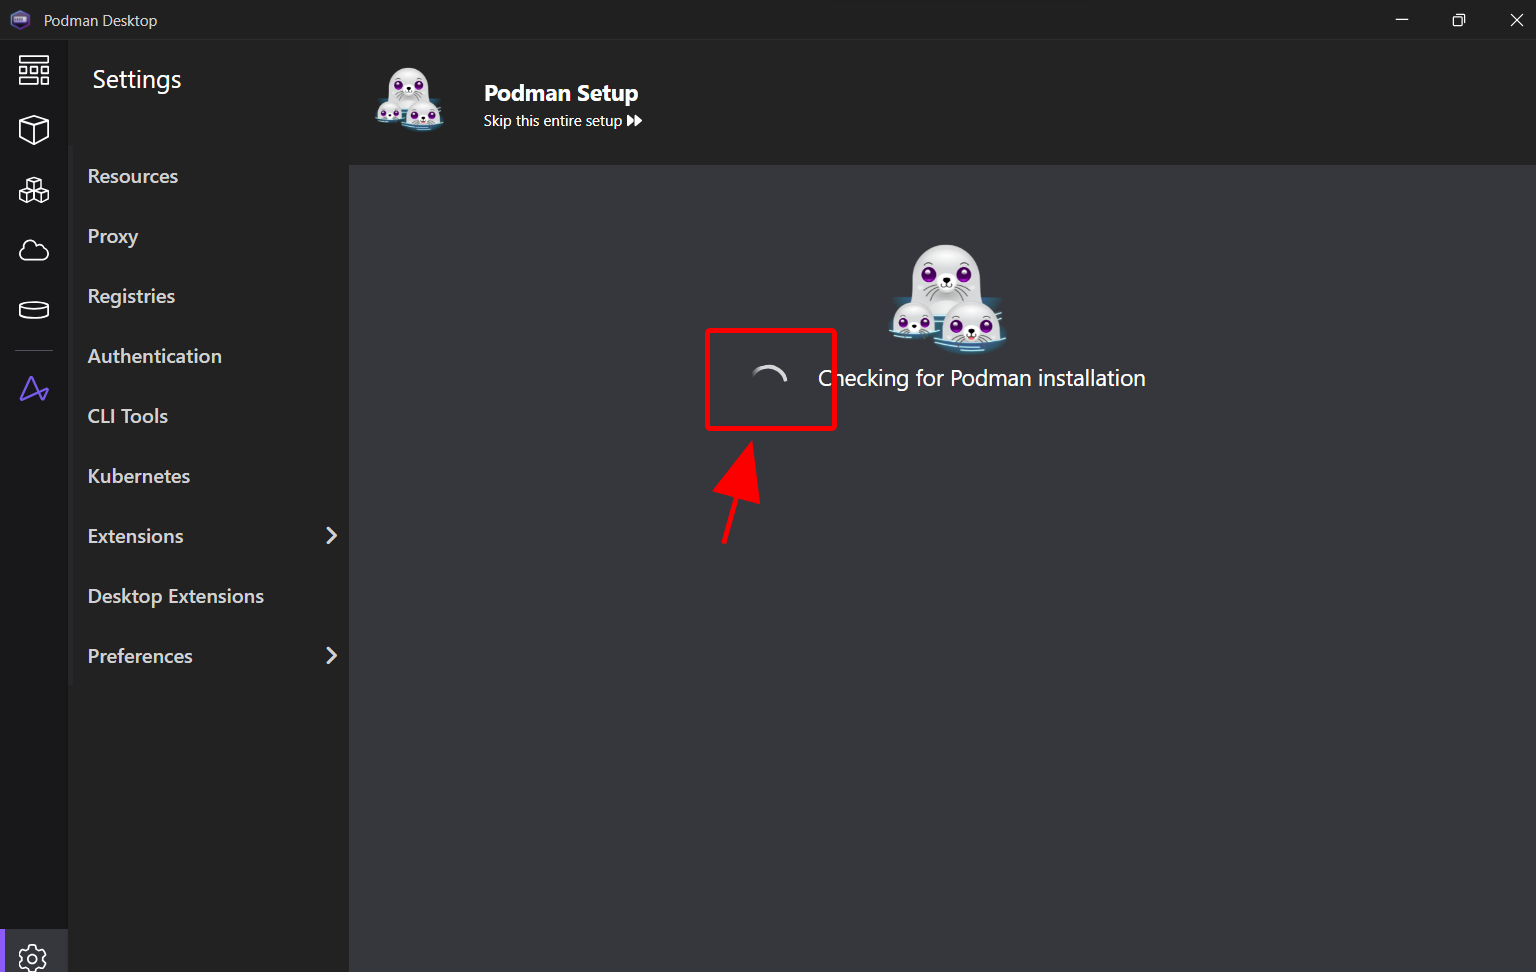
"id": "checkPodmanInstalled",
"title": "Checking for Podman installation",
"command": "podman.onboarding.checkPodmanInstalled",
},
...
],
...
}
在命令执行期间,用户将在标题旁边看到一个加载图标。
CompletionEvents
CompletionEvents 定义了一个步骤何时应被视为完成的条件。
它目前支持 onboardingContext 和 onCommand 事件。前者可用于评估上下文值,例如 onboardingContext:podmanIsInstalled。后者检查命令是否已执行 - onCommand:podman.onboarding.installPodman。
一个在命令执行完成后将用户引导至下一步的实际示例如下:
"commands": [
    {
    "command": "podman.onboarding.checkPodmanInstalled",
    "title": "Podman: Check podman installation"
    },
],
"onboarding": {
    "title": "Podman Setup",
    "steps": [
    {
        "id": "checkPodmanInstalled",
        "title": "Checking for Podman installation",
        "command": "podman.onboarding.checkPodmanInstalled",
        "completionEvents": [
            "onCommand:podman.onboarding.checkPodmanInstalled"
        ]
    },
    ...
    ],
    ...
}
当 checkPodmanInstalled 步骤变为活动状态时,将调用命令 podman.onboarding.checkPodmanInstalled。命令执行完成后,该步骤被视为完成,然后用户将移动到下一个步骤。
这是另一个示例,这次使用上下文值
"commands": [
    {
    "command": "podman.onboarding.checkPodmanInstalled",
    "title": "Podman: Check podman installation"
    },
],
"onboarding": {
    "title": "Podman Setup",
    "steps": [
    {
        "id": "checkPodmanInstalled",
        "title": "Checking for Podman installation",
        "command": "podman.onboarding.checkPodmanInstalled",
        "completionEvents": [
            "onboardingContext:podmanVersion == 4.7.2"
        ]
    },
    ...
    ],
    ...
}
当 checkPodmanInstalled 步骤变为活动状态时,将调用命令 podman.onboarding.checkPodmanInstalled。一旦上下文值 podmanVersion 等于 4.7.2,该步骤将被标记为已完成,用户将移动到下一个步骤。
你可能会想:谁或什么设置了上下文值?如果你使用自定义上下文值,那么设置它应该是你的扩展的工作。以上述示例为例,我们可以在执行 podman.onboarding.checkPodmanInstalled 期间设置上下文值,例如:
extensionApi.commands.registerCommand(
    'podman.onboarding.checkPodmanInstalled',
    async () => {
      // do something
      ...
      // set podmanVersion context value so we can mark the step as complete
      extensionApi.context.setValue('podmanVersion', '4.7.2', 'onboarding');
    }
)
更新上下文后,UI 将刷新,Podman Desktop 将用户移动到新步骤。
内容
content 属性是一个数组的数组,其中父数组中的每个项定义一行,子数组中的每个项定义一个单元格。
content = [
  ['cell', 'cell'], //row
  ['cell', 'cell', 'cell'], //row
];
内容单元格条目的 JSON 模式如下:
"type": "object",
"properties": {
    "value": {
        "type": "string"
    },
    "highlight": {
        "type": "boolean"
    },
    "when": {
        "type": "string"
    }
},
"required": ["value"]
Value 是唯一强制性的字段,它可以是简单的字符串或 Markdown 字符串,用于渲染高级对象。
除了所有标准 Markdown 语法外,Podman Desktop 还提供了 3 个自定义 Markdown 组件:button、link 和 warnings list。
1 - 您可以创建一个执行命令的按钮(语法 - :button[按钮名称]{command=command.example title="工具提示文本"})或行为类似于链接的按钮(语法 - :button[按钮名称]{href=http://my-link title="工具提示文本"})。
例如
"value": ":button[Check requirements again]{command=podman.onboarding.checkPodmanRequirements}"

2 - 同样,您可以创建一个执行命令的链接(语法 :link[命令链接名称]{command=command.example title="工具提示文本"})或行为像普通链接的链接(语法 - :link[命令链接名称]{href=http://my-link title="工具提示文本"})
例如
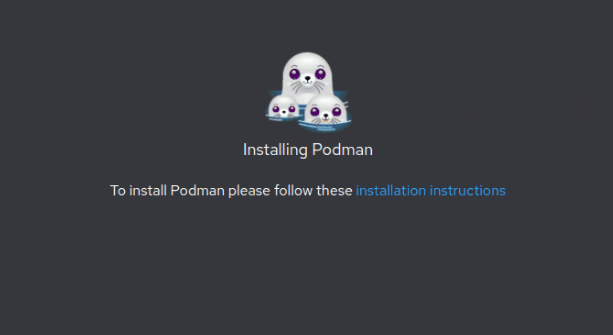
"value": "To install Podman please follow these :link[installation instructions]{href=https://podman.org.cn/docs/installation#installing-on-linux}"
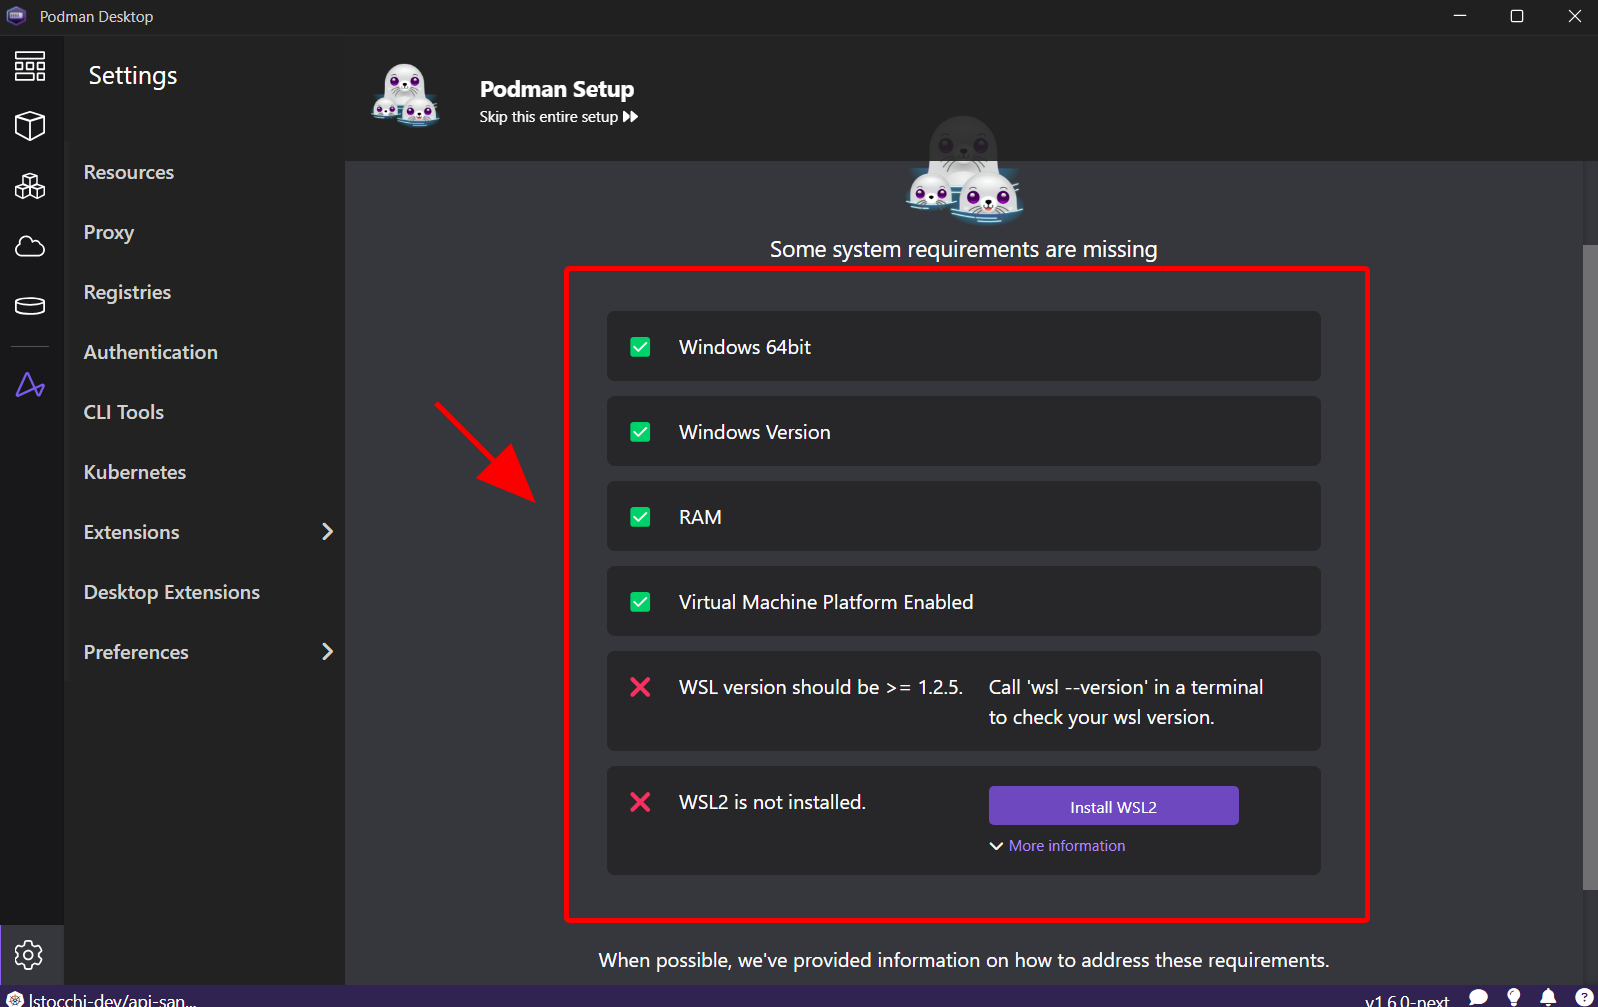
3 - 警告组件允许显示一个项目列表(语法 - :warnings[[item]]),其中一个项目包括:
"type": "object",
"properties": {
    "state": {
        "type": "string"
    },
    "description": {
        "type": "string"
    },
    "command": {
        "type": "object",
        "properties": {
            "id": {
            "type": "string"
            },
            "title": {
            "type": "string"
            }
        },
        "required": [
            "id",
            "title"
        ]
    },
    "docDescription": {
        "type": "string"
    },
    "docLinks": {
        "type": "array",
        "items": {
            "type": "object",
            "properties": {
            "title": {
                "type": "string"
            },
            "url": {
                "type": "string"
            },
            "group": {
                "type": "string"
            }
            },
            "required": [
            "title",
            "url",
            "group"
            ]
        }
    },
}
在 package.json 中添加完整的列表可能会令人困惑,因此更好的方法是使用上下文值
"value": ":warnings[${onboardingContext:warningsMarkdown}]"
在运行时,${onboardingContext:warningsMarkdown} 将被后端填充的实际列表替换
const warnings = [];
...
const warning = {
    state: res.successful ? 'successful' : 'failed',
    description: res.description,
    docDescription: res.docLinksDescription,
    docLinks: res.docLinks,
    command: res.fixCommand,
};
warnings.push(warning);

extensionApi.context.setValue('warningsMarkdown', warnings, 'onboarding');
highlight 和 when 属性是可选的。它们用于更改背景颜色或定义内容列何时可见。
组件
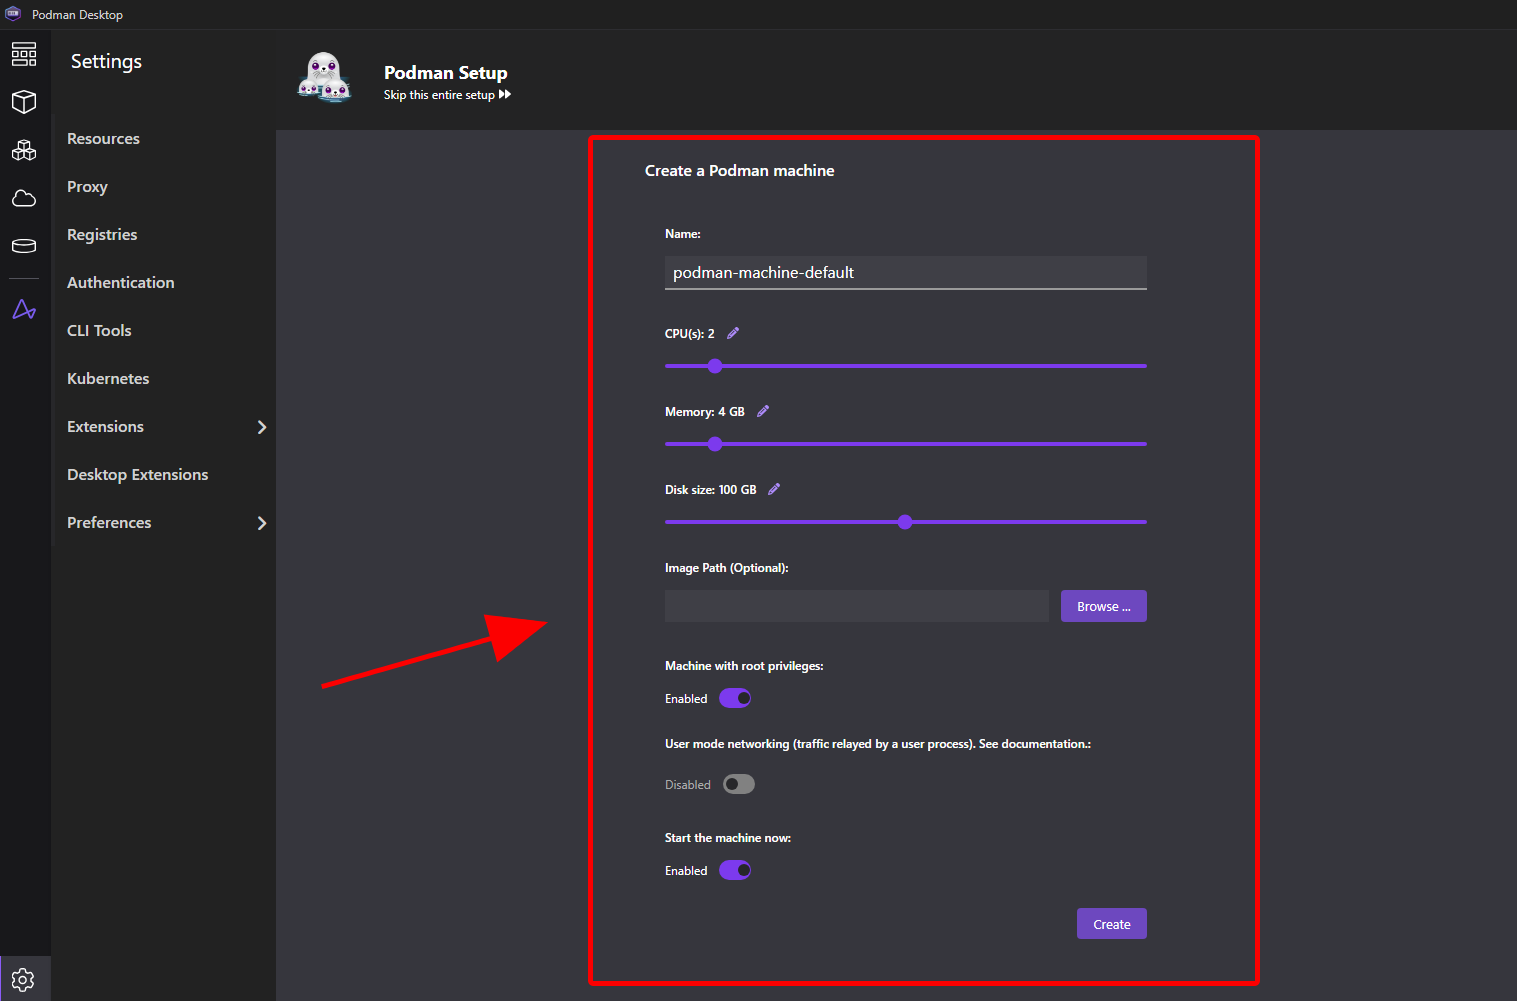
Podman Desktop 拥有一些内置组件,可以完美融入新手引导工作流,例如 创建新连接 向导。如果您正在开发一个允许创建 Kubernetes 集群的扩展,那么重新创建一个用户可以添加名称、要使用的资源等页面就没有意义了。这时组件字段就派上用场了。
通过指定要导入的组件,所有元素、样式和操作都将嵌入到步骤中。
目前,Podman Desktop 仅支持两种类型的新手引导组件:createContainerProviderConnection 和 createKubernetesProviderConnection。
在 Podman 扩展中可以看到一个示例,您可以在工作流中创建 Podman 机器。
{
    "id": "createPodmanMachine",
    "title": "Create a Podman machine",
    "when": "!onboardingContext:podmanMachineExists && !isLinux",
    "completionEvents": [
        "onboardingContext:podmanMachineExists"
    ],
    "component": "createContainerProviderConnection"
},
注意:当使用 component 字段时,应省略 content
When
when 属性定义了步骤何时必须可见。您可以使用任何 when 子句,Podman Desktop 会在上下文更改时对其进行评估。
状态
state(如果设置)允许 Podman Desktop 区分普通步骤和特殊步骤。它用于将步骤与失败状态(failed)或完成状态(completed)关联起来。
注意:最后一个工作流步骤应该具有 completed 状态。
根据状态,Podman Desktop 可能会显示一些默认对象。
当遇到失败状态的步骤时,Podman Desktop 会显示一个 重试 按钮,允许用户重新启动工作流。
{
    "id": "podmanFailedInstallation",
    "title": "Failed installing Podman",
    "when": "onboardingContext:podmanFailedInstallation",
    "state": "failed"
},
{
    "id": "podmanSuccessfullySetup",
    "title": "Podman successfully setup",
    "when": "onboardingContext:podmanIsInstalled",
    "state": "completed"
}